How to Choose the Best PU Stone Wall Panel?
Choosing the right PU Stone Wall Panel requires more than comparing colors and prices. A convincing surface can still fail in a humid room, beside a heater, or under uneven installation conditions. Experienced buyers examine the panel’s density, backing structure, texture depth, and dimensional stability before placing a large order. A small sample reveals useful details, including edge quality, stone variation, paint consistency, and how naturally light touches the surface.
Performance matters as much as appearance. Reliable manufacturers should provide clear product specifications, installation guidance, care instructions, and relevant test documentation. Check the panel’s resistance to moisture, impact, temperature changes, and fire, according to the requirements of the intended building and local regulations. Do not rely on attractive photographs alone. Ask whether the stated results apply to the complete system, including adhesive, joints, coatings, and substrate preparation. That distinction is often overlooked.
A practical evaluation also considers cutting waste, corner pieces, delivery protection, and replacement availability. Panels that look affordable may become expensive after shipping damage or difficult trimming. It is wise to inspect one installed section under daylight and artificial lighting. Even good products can appear too glossy or repetitive across a large wall. This guide compares the essential factors behind a dependable PU Stone Wall Panel choice, while recognizing that no material suits every project. Honest limitations matter. A careful decision balances design, verified performance, installation skill, maintenance demands, and long-term value.
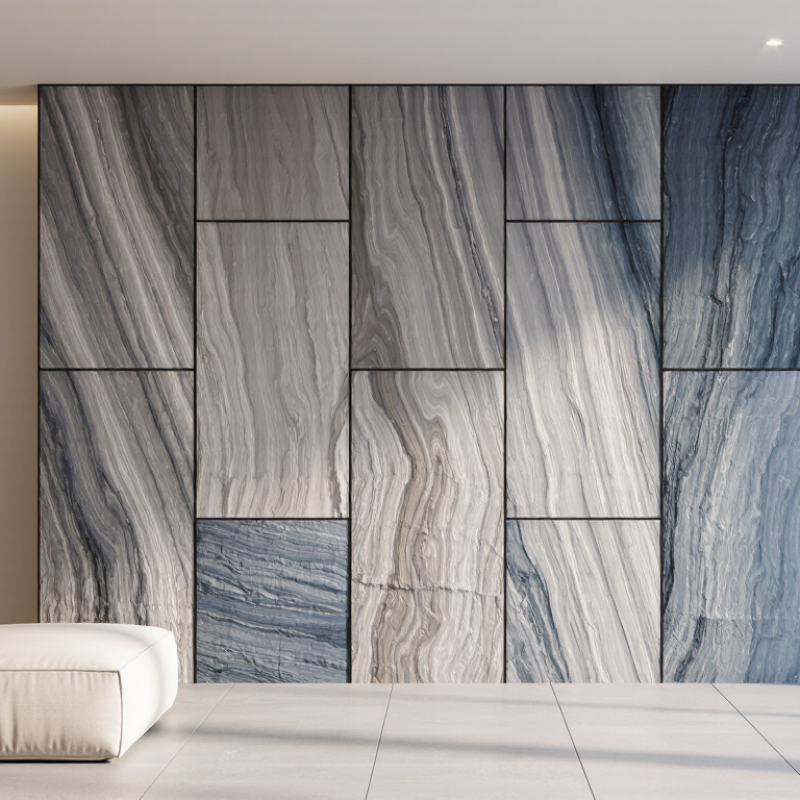
Define PU Stone Wall Panels by Density, Thickness, and R-Value (ASTM C518)
How to Choose the Best PU Stone Wall Panel?
Density, thickness, and R-value deserve careful attention when selecting PU stone wall panels. Density affects the panel’s firmness, surface feel, and resistance to handling damage. A denser panel is not automatically the best insulator. Thermal performance depends on the foam structure and tested conductivity. Request the declared density, not a vague “high-density” claim.
Thickness matters in two ways. It changes the panel’s depth and usually increases its potential insulation value. It also affects window returns, trim alignment, and fastening depth. A 30-millimeter panel may suit a decorative interior wall, while a thicker panel can perform better where thermal control matters. Measure the wall and surrounding details before ordering. Small gaps can weaken real-world results.
R-value should come from reliable test data. ASTM C518 uses a heat flow meter to evaluate steady-state thermal transmission through a specimen. Check the report’s thickness, conditioning, mean temperature, and test direction. R-value comparisons are meaningful only when these conditions match. Confirm whether the value applies to the panel alone or a complete wall assembly. Installation joints, framing, adhesive layers, and air leakage can change performance.
This is where selection becomes less tidy. A panel with impressive laboratory data may perform poorly over an uneven wall. Review the technical sheet, inspect samples, and ask how edges are sealed. I would also recheck the calculation before purchase. Mistakes often hide in simple measurements.
Screen Fire Safety: ASTM E84 Class A Requires Flame Spread 0–25
How to Choose the Best PU Stone Wall Panel?
When selecting a PU stone wall panel, fire performance should guide the decision. ASTM E84 Class A requires a flame spread index between 0 and 25. This rating helps measure how quickly flames travel across a surface. It does not mean the panel is fireproof. The smoke-developed index matters too. Ask for a current test report, not only a product brochure. The report should identify the exact panel, thickness, coating, and test assembly.
From project reviews, I have learned that installation details can change performance. A panel tested alone may perform differently over plywood, gypsum board, or another substrate. Check the approved adhesive, joints, trims, and backing materials. Confirm that the tested configuration matches your wall. One detail I once overlooked was the gap behind the panel. Small spaces can affect heat movement and inspection access. Local building officials or qualified fire professionals should review the complete assembly.
Tips: Request the full ASTM E84 report and verify its laboratory information. Check both flame spread and smoke-developed values. Keep installation records and batch details on site. Do not cut corners around electrical fixtures or penetrations. A Class A label is useful, but it is only one part of responsible material selection. When documentation feels vague, pause and ask better questions.
Compare Moisture Resistance Using ASTM E96 Permeance and Water Absorption
Choosing the best PU stone wall panel requires more than comparing surface texture or color. Moisture performance deserves careful testing, especially in bathrooms, basements, and humid coastal rooms.
ASTM E96 measures water vapor movement through a panel. Its result is reported as permeance, commonly in perms. A lower perm value usually means stronger resistance to vapor diffusion.
However, the test method, temperature, humidity, and panel thickness can change the result. Always compare reports using identical conditions. A number without its test conditions is incomplete.
Water absorption measures how much liquid water the material takes in after exposure. This is different from vapor permeance. A panel may resist liquid splashes but still allow vapor movement through its core.
Request the absorption percentage, test duration, specimen thickness, and conditioning details. Check the panel edges too. Cut edges and unsealed joints often absorb more water than the finished face.
In field projects, I have seen installers focus only on the decorative surface. That shortcut was wrong. A convincing water-resistant panel can still fail when seams remain open behind a sink. Review the technical report, inspect the backing, and confirm compatible sealants. Small details matter. Testing reduces guesswork, but installation quality still deserves honest attention.
Check Durability with ASTM D1621 Compression and D1623 Adhesion Tests
How to Choose the Best PU Stone Wall Panel?
Durability begins with evidence, not appearance. A textured surface may look solid, yet the internal foam determines much of its performance. Ask for recent laboratory reports using ASTM D1621 and ASTM D1623. Check the test date, panel thickness, density, conditioning, and failure mode. Without these details, a single strength number says little.
ASTM D1621 evaluates the compressive properties of rigid cellular materials. It shows how the panel responds when pressure increases. This matters near corners, fasteners, storage areas, and high-contact walls. Compare results at the same deformation level. A thicker panel may perform better, but thickness alone does not guarantee durability. Small test differences can change the comparison.
ASTM D1623 examines tensile adhesion in rigid cellular plastics. The test helps reveal whether the foam, facing, or bonded interface fails first. This is useful when panels include decorative stone layers. Look for cohesive failure inside the material rather than clean separation at the bond line. Also verify adhesive compatibility with the actual substrate. Dust, moisture, uneven plaster, and low temperatures can weaken installation performance. Laboratory results cannot fully predict a poorly prepared wall. That limitation deserves attention. Experienced installers should record surface preparation, adhesive coverage, curing time, and site temperature. A careful choice connects test data with real installation conditions.
How to Choose the Best PU Stone Wall Panel? - Check Durability with ASTM D1621 Compression and D1623 Adhesion Tests
| Evaluation Dimension | Test Method / Unit | Basic PU Panel
Indicative Range | Reinforced PU Panel
Indicative Range | High-Density PU Panel
Indicative Range | Selection Guidance |
| Panel density | Supplier technical data
kg/m³ | 100–160 | 140–220 | 180–280 | Higher density generally improves impact resistance, but it may increase weight and cost. |
| Compressive strength at 10% deformation | ASTM D1621
kPa | 150–300 | 250–500 | 400–700 | For busy corridors and areas exposed to occasional impact, a higher verified value provides a stronger safety margin. |
| Tensile adhesion strength | ASTM D1623
kPa | 100–200 | 180–350 | 250–450 | The failure location matters: cohesive failure within the panel is generally preferable to clean separation at the adhesive interface. |
| Water absorption | ASTM C272 or equivalent
% by volume | ≤ 4.0 | ≤ 3.0 | ≤ 2.0 | Lower absorption is desirable for humid rooms, exterior applications, and locations requiring frequent cleaning. |
| Dimensional stability | ASTM D2126 or equivalent
% change after conditioning | ≤ 2.0 | ≤ 1.5 | ≤ 1.0 | Lower dimensional change helps reduce open joints, edge lifting, and visible gaps caused by temperature or humidity variation. |
| Surface impact resistance | Project specification or internal impact test
Qualitative / energy level | Light duty | Medium duty | Heavy duty | Request a documented impact test when panels will be installed in public, commercial, or high-traffic areas. |
| Adhesive compatibility | Substrate-specific adhesion test
Pass / fail with failure mode | Must be verified | Must be verified | Must be verified | Test the complete system on the actual wall substrate, including primer, adhesive, panel backing, curing time, and temperature. |
| Fire-performance documentation | Applicable local fire classification
Class / rating | Check project requirement | Check project requirement | Check project requirement | PU foam is combustible unless specially formulated and tested. Do not infer fire performance from density alone. |
| Recommended application | Performance-based selection | Bedrooms, decorative feature walls, low-traffic interiors | Living rooms, offices, hospitality interiors, moderate traffic | Commercial interiors, corridors, high-use areas, demanding installations | Select the lightest panel that meets the required compression, adhesion, moisture, fire, and impact criteria. |
Note: The numerical ranges are representative screening values for rigid PU decorative wall-panel constructions, not certifications for a specific product. Confirm the exact panel, facing, adhesive system, substrate, conditioning procedure, and laboratory test report before purchase.
Choose by UV Exposure, Warranty, and Installed Cost per Square Metre
How to Choose the Best PU Stone Wall Panel?
When choosing a PU stone wall panel, assess the wall’s UV exposure before comparing prices. South-facing walls, rooftops, and open balconies usually receive stronger sunlight. Ask for tested colour-retention data, not only a general “UV resistant” claim. A small sample should stay outdoors for several weeks. Check fading, surface brittleness, and temperature changes. I have seen attractive samples look different after continuous summer exposure.
Warranty terms deserve close attention. Confirm the covered period, installation conditions, fading limits, and exclusions. Some warranties require approved adhesives, proper drainage, or documented preparation. Keep purchase records and installation photographs. A long warranty sounds reassuring, but unclear wording can create problems later. Read the details.
Tips: Calculate the complete installed cost per square metre. Include panels, trims, corner pieces, adhesive, labour, scaffolding, surface repairs, and material waste. Measure the actual wall area, then allow extra panels for cuts and future repairs. A cheaper panel may need more preparation or specialist labour. That difference can disappear quickly. Also compare maintenance access, especially on high exterior walls. I once focused too heavily on the panel price and underestimated edge finishing. The lesson was useful, though not cheap. Ask an experienced installer to inspect the substrate before ordering.
How to Choose the Best PU Stone Wall Panel?
Compare UV exposure, expected warranty coverage, and indicative installed cost per square metre before selecting a PU stone wall panel.
Indicative benchmark values for exterior PU stone wall panels: installed cost includes typical material, adhesive, trims, labour, and basic site preparation. Actual prices vary by project access, substrate condition, panel thickness, detailing, and local labour rates. Higher UV resistance and longer warranties generally increase the initial installed cost.